How to install the outlet in the wall?
The external method is used when installation of open wiring (over decorative wall decoration). In this case, the body is fixed to the wall with dowels.

Installation of an internal outlet is used if the line is laid in special gates (for example, during the installation of electrical wiring in an apartment). In this case, you must first install the wall socket in the wall, then proceed to connecting the outlet itself.

Now we will consider in detail each of the methods.
We draw your attention to the fact that wiring with an earthing circuit is currently being used, so this article will discuss the technology of connecting an outlet with grounding!
Installation options
Inside the wall
Installing the outlet inside the wall is more often, because in this case, the recessed body does not catch the eye and does not spoil the interior of the entire room.
Before starting work, we need the following materials and tools:
- plastic overgrowth - 1 pc.;
- internal socket - 1 pc.;
- alabaster;
- screwdrivers (curly, straight and with indicator);
- sharp knife;
- pliers.
Please note that wiring is not considered in this article. Connecting the electrical outlet is carried out in finished gates with veins! You can find out more about wire laying in the article: installation of electrical wiring in the house!

The appearance of the strobes
So, to make the information easier to perceive, we provide you with step-by-step instructions for installing the outlet in a concrete wall:
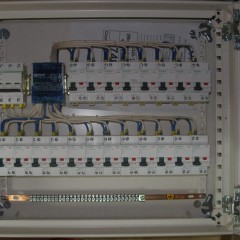
Step 1 - Power Outage
It is very important to turn off the electricity in the room before starting electrical work. To do this, turn off the corresponding machine in the switchboard, and then check for current at the installation site using an indicator screwdriver. About, how to use an indicator screwdriver, we told in a separate article.
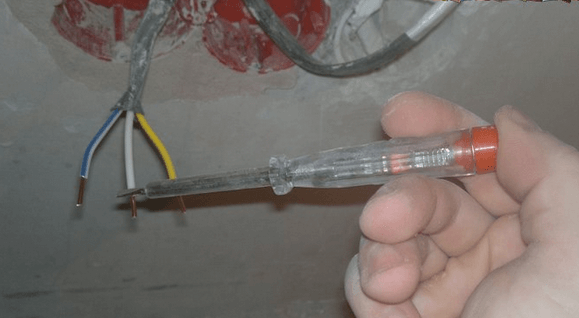
Using an indicator screwdriver
Step 2 - Installing the Socket
Today, there are metal and plastic sockets. It is necessary to give preference to the latter, because they have low cost and dimensions that meet new standards. If you decide to install the socket in a metal socket, it is unlikely that it will be possible to fix the core with bursting legs, as a result of which the case will hang and fail over time.
It is recommended to use alabaster to install a plastic undersocket in the supporting wall.The strobe needs to be slightly moistened with water, after which put a 2-3 mm solution and quickly fix the product.

Mounting the socket
You can also mount using self-tapping screws, but in this case, the reliability of the installation will not be so high. After that, electrical conductors are inserted into special holes, as shown in the photo.
Fixation of cores in the housing
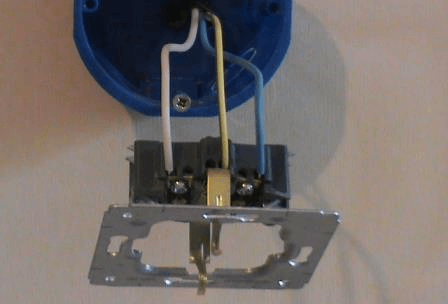
Step 3 - Attaching the Case
Now you need to install the case itself - the place where the contacts will be connected. To begin with, all 3 cores (earth, zero and phase) must be cleaned with a knife from insulation. The stripping length should be at least 7 mm (better than 10 mm). In order not to damage the current-carrying conductors, we recommend reading about how to remove insulation from a wire. Further, all contacts must be fixed in the housing. The design of the mechanism includes 5 screws: 2 side for spreading the legs, 1 for grounding (in the center) and 2 for phase / zero (to the right and left of the center). All you need to do is loosen the 3 central screws, insert the exposed wires and tighten them carefully with a screwdriver.
Product design
An important rule for installing the outlet is that the phase must be connected to the left hole (if you look at the housing fixed in the wall), and zero to the right. This custom has been used by electricians for a long time and allows you to quickly find each of the conductors, if missing wire color marking.
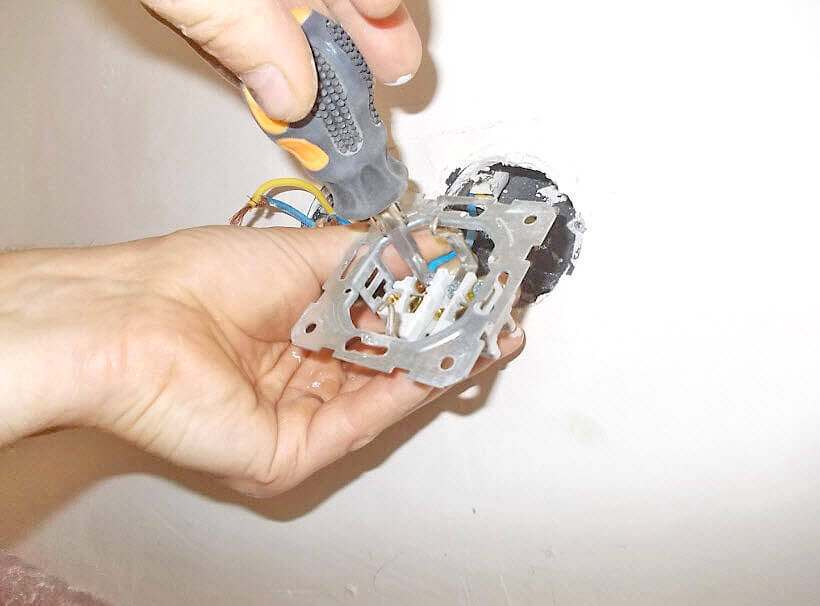
After that, it is necessary to fix the housing in the socket. To do this, place it evenly in the wall (so that the socket is not skewed after installation) and open the legs with the help of side screws so that they cut into the walls reliably.

Good advice should also be given here. At choosing outlets for home, give preference to products that have paws with two teeth - they are more firmly fixed in the wall! Instead of paws, an overlaid case can be used (provided in the photo below). In this case, fastening is carried out with screws on both sides of the rim.

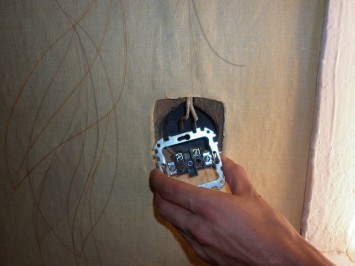
Step 4 - Setting the Edging
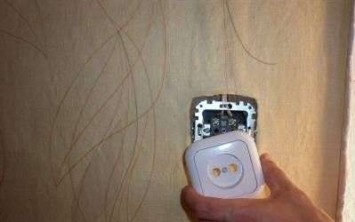
Now that all the screws are securely tightened, you need to hide the case behind the decorative edging. It is also fixed with a central screw. There is nothing complicated, just tighten the screws all the way.
-
- Core fixing

-
- Overlay

That's the whole technology of installing and connecting an internal outlet with your own hands. Be sure to ensure that all cores are tightened securely. If the joints are loosened, after a while the case will begin to melt due to heating, which will soon lead to spontaneous combustion of the wiring and short circuit!
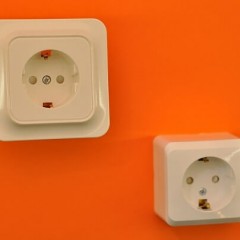
Open way
The external version of the electrical outlet is used when installation of electrical wiring in the bath and garage.
The advantage of this design is as follows:
- simpler replacement, repair and installation;
- You can quickly identify problems by the appearance of the product.
Disadvantages:
- increased cost of the product;
- open wiring can degrade the interior of the room.
So, we will consider how to install an external outlet ourselves, as well as connect it to a 220 Volt network. As in the previous case, first you need to de-energize the room and make sure that there is no electricity with an indicator screwdriver. Next, you need to disassemble the case, which consists of a back cover with a core and a front cover.
First, we attach the back cover to the wall. To do this, we lean it, set it on the level (so that there are no distortions) and mark the places of the mounting holes with a simple pencil. After this, we mark the marked places with a drill and drive a dowel into them. Now you can fix the cover with screws and proceed to connecting the wires.

Please note that paronite is recommended to be placed between the back cover and the wall (which is usually wooden). This material will prevent spontaneous combustion of the wall during ignition of the insulation.
When all three contacts are tightened with screws, you can install the front cover, which completes the process of connecting the overhead electrical accessories. It remains only to provide you with some useful tips that will allow you to properly connect the outlet with your own hands!
Useful Tips
Experienced electricians are advised to consider the following recommendations when installing the outlet in the house:
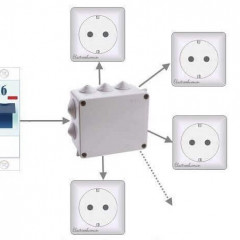
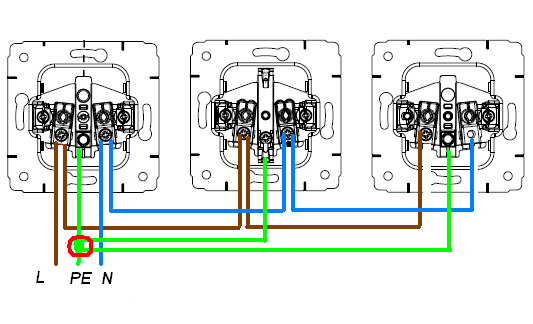
- If there is a need to connect several electrical appliances nearby in the same room, it is better install the outlet block. In this case, there is no need to lay a separate line for each electric “point”, because all products are connected by a loop (as in the diagram).
-
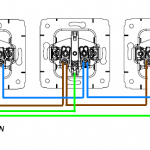
- Wiring diagram
-
- When buying a socket, choose products with ribbed inner walls. This will allow more secure engagement of the bursting feet during installation.
- If the inner walls are smooth, use a chisel to cut through small holes exactly under the hook of the paws, so that in the future the socket does not fall out and does not fall out.
- When spreading the paws, turn the screws in turn so that the core locks smoothly. If you first tighten one screw and then another, there will be a skew.
- Outlet height not standardized, but it is usually customary to install the product 60 cm above the floor. In the children's room, the height should increase to one and a half meters, so that the child is not exposed to danger with his curiosity. It is not recommended to mount the product below 20 cm from the floor, as During wet cleaning, water may enter the product, resulting in negative consequences.
- If suddenly the cable breaks in the strobe and its length is not enough to connect the outlet, it is recommended to use one of wire connection methods. The best way is to use terminal blocks!
- Make contacts from above. In this case, maintenance and repair will be more convenient.
- Use sockets only from quality manufacturers: legrand (Legrand), Schneider electric (Schneider Electric), etc.

Video instruction
We also recommend that you watch this video instruction, which will allow you to see in more detail how to properly install and connect the outlet:
So we examined how to install the outlet and do it yourself. As you can see, the installation is not too complicated, so at home, anyone who follows our recommendations will be able to do everything on their own!
Similar materials: