How to use the indicator screwdriver?
Existing types of devices
First, let’s tell you what indicator screwdrivers are and what is the advantage of each type. To date, it is customary to use the following types of indicators:
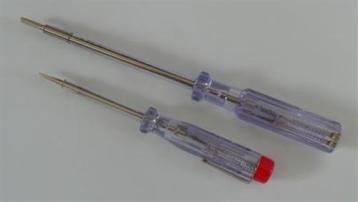
- Conventional probe without a battery with a light bulb. The principle of operation of such a model is quite simple: the current flows to the sting, after which it is directed to the resistor, limited and supplied to the indicator light. We draw your attention to the fact that on top of the screwdriver there is a metal nickel, which is the second contact. To check the wiring, a person’s finger must be on this nickle, otherwise the probe will not work (the circuit will not be closed). The advantage of this model is low cost and simple construction. The second advantage is immediately the main drawback - the indicator screwdriver without a battery has a minimum set of functions that only allows you to find the phase and zero, or check the voltage at the outlet. You will not succeed in finding a break in the neutral wire or phase wire with such a tool, because the indication threshold is quite high - over 60 volts.

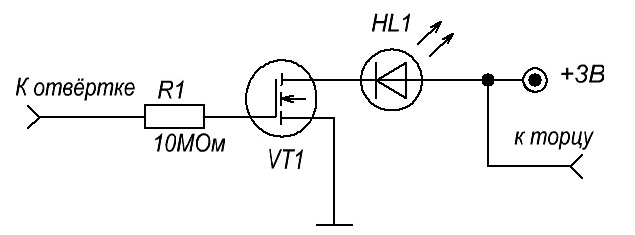
- Indicator with battery. A more advanced version of the probe is with a power supply and an LED. In appearance, they practically do not differ from the previous model, but if you look inside, you can see the bipolar transistor, which is shown in the diagram below. You can use the indicator screwdriver with a battery for the following types of work: determination of phase / zero, plus and minus (in the car), open circuit and the location of the wiring under the plaster. The last opportunity allows find the wire in the wall in a non-contact way, but the error can be high. The advantages of a screwdriver with a battery is that, compared to a conventional probe, such a device can even be used to check the integrity of conductors and fuses, which makes it multifunctional. A battery indicator is best suited for home use.

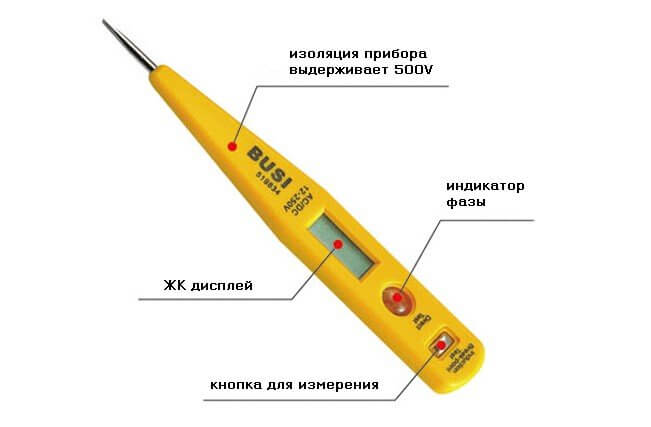
- Electronic indicator screwdriver with LCD display. Such a model is multifunctional and in addition to including all the functions described above, it can also additionally determine the voltage value (in the range from 12 to 220 V). In addition, an electronic indicator can be used to detect hidden wiring. In fact, the electronic probe is a mini version of the multimeter.Due to the fact that its cost is 3-4 times higher than conventional indicators and at the same time there are not so many functions as a full-fledged tester, professional electricians use it extremely rarely. Self-taught home electricians are also not recommended to use this option, because the overpayment will be significant, but all the functions will not be used anyway.
So we examined the most popular types of indicator screwdrivers. Next, we will look at how to use each of the models for the most common situations that can happen at home.
Usage Tips
At home, an indicator may be needed for the following reasons:
- find phase and zero in a socket or lamp;
- make sure that there is voltage in the mains;
- determine the electrical appliance from which the phase breakdown occurs on the housing;
- check the operation of the electric extension cord;
- find the wire in the wall under the tile or plaster.
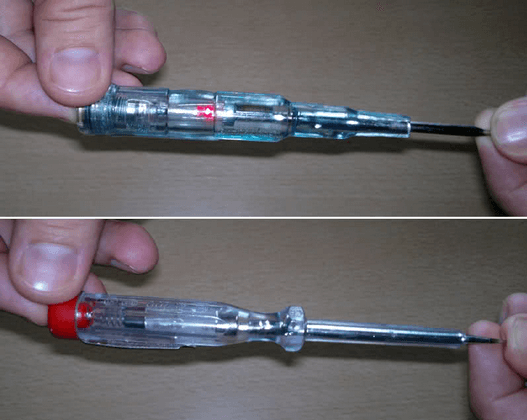
Before using the indicator, you need to check it. To do this, it is recommended to check the operation on the live section (so we will find out if the indicator light lights up at all). In addition, if the probe is with a battery, you can check as follows: with one finger touch the sting, the other with a nickle and if the light comes on (as shown in the photo), then the device is working.
So, review the instructions on how to use the indicator screwdriver correctly in each situation.
Phase / Zero Search
The first and most popular situation in which you have to use a probe is when you need to find a phase conductor, if at the same time wire color marking missing. In this case, you need to touch a screwdriver with a sting of a screwdriver. If the light comes on - you have found the phase, no - 0.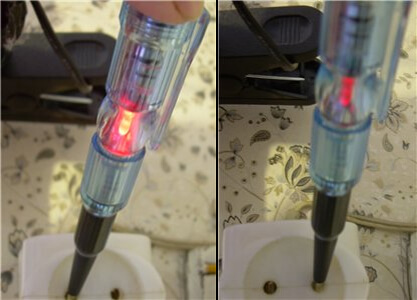
When using an ordinary probe, do not forget to touch your finger with a finger, otherwise it will not work to determine the polarity! If the indicator screwdriver is with a battery, there is no need to touch the nickle.
To determine if there is a voltage in the network, just touch the plugs to the sockets of the outlet. The LED is on - there is voltage, no, then no.
Leak detection
The second reason you need to use the indicator screwdriver at home is when you need to find where it happens current leak, in other words, a breakdown on the body of an electrical appliance. In this case, both a regular probe and an electronic version can deal with the problem. To use in this case is simple - you need to bring the sting to the ground antenna in one of the outlets. If the LED lights up, there is a leak.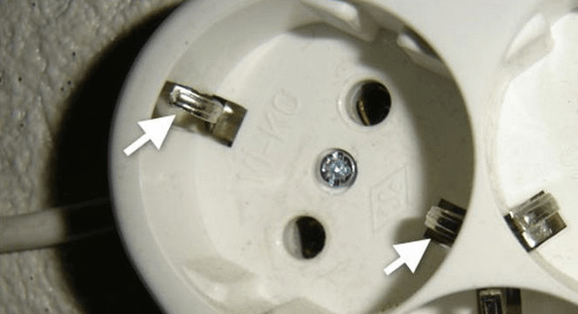
Next, you need to act by the method of exclusion, namely:
- disconnect all electrical appliances from the network;
- turn on each device in turn and check for leaks;
- the lamp does not light up - the equipment is operational, lights up - there is a leak on the switched on device.
Immediately recommend that you familiarize yourself with similar material - reasons for the operation of the RCDbecause in the event of a leak, this type of automation is immediately triggered, as a result of which the electricity in the house is turned off. If the indicator lights up at zero, then the neutral conductor has burned out and you have two phases in the wiring. This is very dangerous and you need to go straight to troubleshooting. We advise you to immediately see consequences of a zero cut on the power grid to see how dangerous it is.
Looking for a wire break
If the electricity does not go to outlets and electrical appliances in the room, but there is power at the input, you can try to determine the wire breakage with an indicator screwdriver. The probe, of course, will not show the place of damage to the hidden wiring so well, but, nevertheless, the electronic device will be able to detect an approximate breakage zone. To do this, based on the wiring diagram in the house, conduct a sting at the place where the cable lies in the wall from the junction box to the outlet.Where a break occurs, the light should stop burning.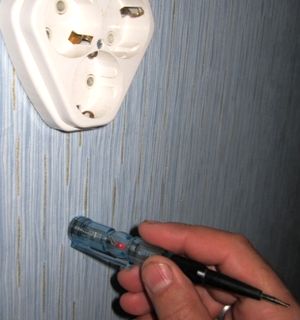
The second search method is checking the entire line. In this case, you will not be able to determine with an indicator where contact breakage occurs exactly, but you can at least make sure that it is there. By the way, in this case, you can even use the simplest indicator screwdriver with a battery. All that is needed is to disconnect the electric power on the shield, take one bare wire in one hand, and touch the probe with the sting of the second core. With this method, a closed circuit is formed and if there is indeed a break, the bulb should not light up.
Immediately draw your attention to the fact that it is necessary to check the open at the lamp with the power turned off, but the light switch is turned on. If you forget to close the circuit on the switch, the screwdriver indicator will show that the circuit is broken, but this does not say that there is an open!
Immediately I would like to add one more case, which is often found in everyday life. To check whether the working lamp, you need to take it with your fingers on the base and touch the sting to the central contact. In this case, the finger should lie on the top of the pen. If the indicator light in the handle lights up, then the lamp itself is working!
Check the extension cord
Well, the last point that I would like to dwell on is to tell how to use the indicator screwdriver correctly when checking the electric extension cord. Here things are a little more complicated, so take a closer look at the material described below.
First you need to disconnect the "carry" from the network and other electrical appliances. After that, you need to make a jumper from the wire and insert it between the sockets of one of the sockets of the unit (short circuit). Further, everything is quite simple - you need to take one of the plug electrodes with your finger, and touch the second with the probe tip. The result is determined as always - the indicator light is on, so everything works, no, respectively, no.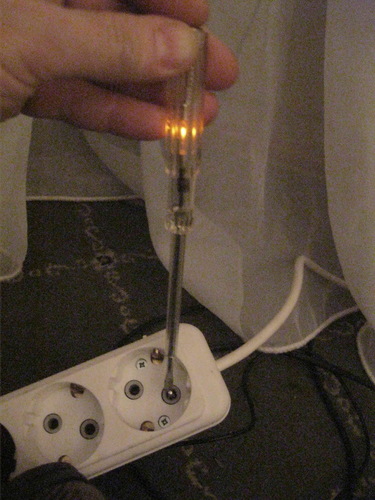
After checking, be sure to pull the jumper out of the sockets, otherwise when you connect the carrying case there will be a short circuit in the mains. If the indicator indicates that the product is not working, we recommend do-it-yourself electric extension cordand not repair the old one!
So we sorted out all the most popular cases in which you need to know how to use the indicator screwdriver with a battery and without a power source. We hope that now you understand the principle of the probe and the situations in which you can use it.
Also read:




And in the indicator screwdriver circuit, a bipolar transistor
field rather than bipolar