How to replace wiring in a private house and what is needed for this
We determine the complexity of the work

So, first you need to do an analysis of the old wiring and find out the following points:
- Is there grounding system Location on. This is very important, because without the presence of a grounding circuit, you can suffer from a malfunction of household appliances or a breakdown of insulation.
- Is it possible partially change wiring in a private house or you must definitely make a complete replacement of the electrics. It is possible that some rooms have recently been renovated and, accordingly, a new, more powerful cable has been extended, which will suit modern requirements.
- Will you be able to carry out the electrical installation yourself or for this you will have to hire a specialist. It should be noted that replacing the wiring in the house with your own hands is not difficult, but the event is time-consuming and requires special care. If you do not doubt your abilities, of course, do everything yourself. Otherwise, initially find out the cost of the wizard, because for this you will have to give a considerable amount of money.
Having collected all the necessary information about the complexity and scope of work, you can get down to business. About whether to completely replace the old wiring with a new one, is described in detail in the video:
Create a wiring diagram
At this stage, it is necessary to think over the cable wiring diagram for air and indoors. It is also necessary to properly design grounding system, which will be located on the site of the house. We recommend that you familiarize yourself with the following options:


As for grounding, it is better to give preference to the "triangle" system:
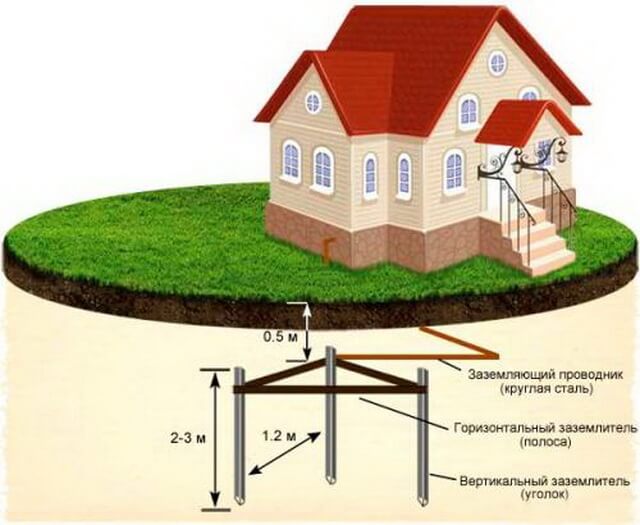
Grounding in a private house is usually done like this: three metal pins (or corners) are driven in at equal distances from each other so that they are at the vertices of the triangle, then they are welded with a metal strip - you get an earthing switch to which you can lay the wire from the shield. Details about how to make grounding we spoke in the article:https://my.electricianexp.com/en/pravilnoe-zazemlenie-v-chastnom-dome.html.
Having created the project, you can proceed to the calculation of materials and the selection of the most suitable elements for replacing the wiring in the house with your own hands.
Count and select materials

The first thing you need to calculate is the cross-section of the cable that will go through the air and inside the living room. This stage is very important becauseIt is precisely because of the diameter of the cores that the wiring in a private house is replaced (the old line, most likely with small-sized aluminum conductors). Calculation of cable cross-section by power, length and current simple, so here you can easily cope without the help of a wizard.
Inside a private house from the junction boxes, the wiring will be divided into several groups of different sections:
- for lighting - 1.5 mm2;
- for sockets - 2.5 mm2;
- for powerful electrical appliances (for example, a boiler) - 4-6 mm2;
Important! To connect powerful electrical appliances, we lay a wire calculated according to the load and current requirements, for example, to connect a single-phase electric stove, according to SP 31.110-2003, it is necessary to lay a cable with a cross-section of at least 6 square meters. mm In any case, pre-calculate the power section.
It should be noted that the wiring can be carried out both in an open way and hidden. Which option to choose when replacing is up to you to decide. However, if a brick building has much more advantages, hidden wiring, therefore, the technology will be presented tangent to this method. If you decide to replace the wiring in a wooden house, it is better to use open cable routing.
As for protective automation - RCD and circuit breaker, they are selected for each group of wires separately. A 10-amp circuit breaker is connected to lighting, 16A to sockets, and to high-power household appliances they are connected to a circuit breaker that corresponds to the current consumed by the devices. How to convert power to current and vice versa, we described in the article: https://my.electricianexp.com/en/kak-perevesti-ampery-v-kilovatty-i-obratno.html.
All lines are protected by group RCDs, their current can be calculated, but in most cases they use the unspoken rule - differential current (aka tripping current or leakage current) of group RCDs:
- for the bathroom - 10-30 mA;
- for other rooms - 30 mA (according to PUE 7.1.79);
- input 100-300 mA (according to PUE 7.1.84).
The rated current of the RCD must be equal to or one step greater than that of the circuit breakers that protect this circuit. This means that if the machine is at 16A, then the RCD must be at 16 or 25A. RCD leakage current calculation for individual devices and network leakage is carried out according to PUE 7.1.83.
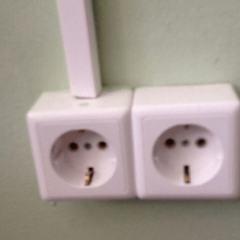
It is recommended to use high-quality sockets and switches so that they can also withstand current loads (the ampere marking is indicated on the case). For open wiring in the house, you must additionally purchase a corrugation, cable channels or electrical skirting boards, depending on what you choose in your case. After selecting all the components, you can count their number and go shopping.
Delete the old line
At this stage, you are already directly starting to replace the wiring in a private house with your own hands. First, turn off the power at the entrance to the housing (usually a distribution panel is installed in the corridor). After that, free the rooms from furniture for a hassle-free repair.
Old wiring must be completely replaced, starting from junction boxes. If for some reason it is impossible to pull the cable from the gate, it is better to leave it only carefully insulated on both sides. Old strobes can be used for a new electrical installation, if you are satisfied with the former location of the switches and sockets. If you want to change the track, drill new grooves according to the created scheme. As soon as the entire old line is removed, you can proceed to laying a new one.
Getting to the installation work
In detail installation of electrical wiring in the house We considered in the corresponding article, which we recommend that you familiarize yourself with. In order for you to understand the entire complexity of the work, we provide you with a brief step-by-step instruction on replacing the wiring in the house:
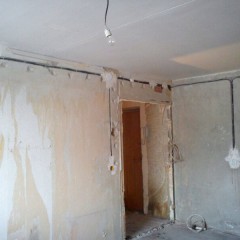
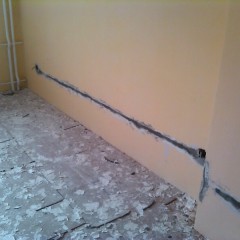
- Walls are prepared: with a pencil and a building level, the wiring route is marked in accordance with the drawn diagram.

- A grinder or a chamfer (shown in the photo) creates grooves in the wall that will serve as a seat for the entire power line. By the way, you can do a chipper yourselfunless of course there is a desire.

- Installed sockets and junction boxes.

- The cable is fixed in the gates using special clamps or alabaster (do not rush to plaster the walls, because it is better to do this after the wiring replacement in the house is completely completed).
- Sockets and switches are installed.

- Protective automation in the switchboard is connected.

Check the wiring
When you completely complete the wiring replacement in a private house, it will be necessary to carry out a verification check of the finished line. You can use a multimeter and an indicator screwdriver for this. The latter option will allow you to check the voltage in outlets and other electrical points, however, it is better to dial with a multimeter to make sure that there is no short circuit in the wiring.
If the device does not show errors, the walls can be puttied and proceed to the decorative finish. Finally, we recommend that you review the step-by-step instructions for replacing the electrical wiring:
That's the whole technology of replacing the wiring in the house with your own hands! We hope that the information was understandable and useful for you!
Related Material:


Very helpful article. I liked the design and photo.