Ways to check the performance of the chandelier
Check before purchase
Each appliance must undergo such a check when purchased at a store. In this case, the test consists in connecting the lighting device to a voltage source and demonstrating all modes of its operation. If for some reason this could not be done, do not despair. You can check the lighting device yourself at home.
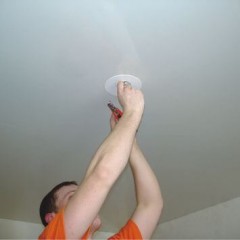
The purchase is exempted from packaging and placed on the desktop, on the floor, or temporarily suspended at a low height, so that it is convenient to work with. Since the chandelier has not yet been connected to the network, the correctness of its internal connections should be checked, and a short circuit test should also be performed. The order of testing for operability depends on how the circuit diagram of the internal connections of the lamp is made.

The first option - the chandelier is controlled by a single-key switch or dimmer. In this case, the general power supply is carried out only through two wires that are brought out or connected to the connection block, where external power is supplied. We perform the following sequence of actions:
- Without installing the lamp, measure the resistance between the two leads of the chandelier with a multimeter or tester.
- If the device indicates a short circuit (resistance is close to zero), the chandelier must be disassembled and repaired.
- With the value of resistance tending to infinity, we install light bulbs and apply voltage according to the temporary scheme through the outlet.
- If all the lamps are lit, the chandelier is in good condition and is ready for use.
- If there is no glow of one or several bulbs, we continue the test.
- Having turned off the power to the lamp, with a multimeter or tester, you need to check the presence of a circuit between the leads of the chandelier and the contacts of its lampholders.
- If all circuits “ring”, the cause is a malfunction of the lamp itself, or a sticky central contact lobe of the cartridge. In this case, it must be bent gently (turning off the power) on itself to ensure contact with the base.
The second option - the ceiling lamp is controlled by a two-gang switch. In this case, there are three outputs for connecting power. One of them is common and is directly connected to the neutral wire. On the other two, the phase is fed by separate keys of the switch, switching various groups of bulbs.You can check the presence of phase voltage on the supply wire with an indicator screwdriver.

Performance check is carried out in the following order:
- In the absence of marking, we find the common wire and mark it. He must be in contact with all cartridges. The other two wires “ring” only with the cartridges of their group. Testing is performed with a multimeter in ohmmeter mode, or with a tester.
- Then you need to check the resistance between the common wire and the other two (together or separately).
- In the absence of a short circuit, you can screw in the lamp and make a test switch.
- By applying voltage between the common wire and the terminals of each of the groups, we make sure that they are turned on correctly.
Failure Check
The malfunctions that a chandelier can manifest during operation can be divided into two categories:
- When you try to turn on the light or one of the lamp groups, the fuse fuse blows or the machine in the shield is turned off.
- One or more lights do not turn on.
In the first case, in the connection diagram of the chandelier occurred short circuit. You can finally verify this by measuring the resistance between the power wires of the chandelier, having previously disconnected them. If the diagnosis is confirmed, the chandelier needs to be disassembled and the internal connections checked.

In the second case, you need to make sure that the voltage does not fit the cartridges when the light is turned on. You can verify this as follows. We install the multimeter in the mode of measuring the mains voltage and carefully, using the isolated probes of the device, measure between the threaded part of the cartridge and its central lobe. To finally make sure that the problem is inside the chandelier, we check whether voltage is supplied to its contact block. If it is present there, the device should be disassembled and the wiring diagram checked.

Sometimes it is necessary to change the internal circuitry of the chandelier, if it is necessary to divide the lamps into groups, or change the number of lamps in existing groups. After installation is complete, before connecting to the network, the chandelier must be checked for operability in the same volume as it was described for a new product.
And finally, I would like to say a few words about lighting devices of a more complex design. Everything written above applies to lamps of traditional design, which use 220 Volt lamps. Currently, lighting fixtures equipped with 12 Volt lamps, the circuit of which includes a transformer or a power adapter made in the form of a sealed unit filled with a compound, are gaining popularity. It is not difficult to check such an adapter for operability; it is enough to measure the voltage at the input and make sure that 12 volts are present at the output.
We also recommend that you watch the video, which clearly shows one of the most common malfunctions of the ceiling lamp, causing a short circuit:
That's all I wanted to tell you about how to check the chandelier for operability with a multimeter and indicator screwdriver. We hope the information provided was useful and interesting for you.
We also recommend reading: