We collect the laser level from improvised materials
Buying an expensive level for domestic use does not make sense, since this device costs a lot of money, and it should not be used often. If you need to draw an even horizontal line on the wall, or install the structure parallel to the ground, you can do the laser level yourself, using improvised materials that can be found in any private house. This will not take you much time and money, however you will get a good tool that you will use for many years. Next, we will provide two simple master classes on making a handmade homemade level, it will take you no more than half an hour to work.
Option number 1 - Use a flat stand
In the first case, in order to independently make the device, we need the following materials:
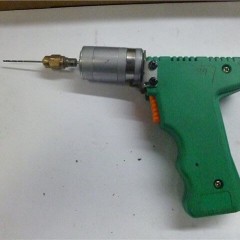
- an ordinary laser pointer, which is sold at kiosks and on the market and is not expensive (shown in the photo below);
- bubble building level, you can buy in a specialized store;
- wooden peg, from 1 to 1.3 meters long, with a diameter of 5 to 6 cm;
- a small piece of rubber;
- a sheet of plywood or boards along the length of the level.

Having prepared all the materials, you can proceed to the assembly of a home-made device. To help you understand how to make a laser level with your own hands, we provide a step-by-step guide:
- We are preparing a laser pointer. To make the beam brighter and clearer, gently wipe the lens to remove any dirt.
- We will improve the construction level. On top of the tool you need to fix the pointer, for which it is better to use clamps for wires or wire. So that in the future it was possible to slightly adjust the direction of the laser beam, place a piece of rubber between the level and the pointer, as shown in the drawing.

- Assembling the stand. First, one of the ends of the bar needs to be sharpened, giving it the shape of a cone, so that it goes well into the soil. After this, it is necessary to assemble a reliable stand from the peg and plywood sheet by screwing the sheet to the second end of the bar with a self-tapping screw. We draw your attention to the fact that plywood must be screwed strictly perpendicularly, otherwise the accuracy of the measurements will leave much to be desired. For a more reliable fixation, it is worth using metal furniture corners, however, remember that sometimes such parts do not have an angle of 90 degrees, so after assembly, the design must be checked with a square.
That's the whole manufacturing instruction. As you can see, making a simple laser level with your own hands is not difficult, but the problem is that such a homemade product cannot be installed on a hard surface, for example, a concrete screed or wooden floor. Usually it is used outdoors. To solve this problem, you can also screw the stand from the plywood sheet from the second end of the peg.In addition, you can make a support of a special design, like a real level, however, making a tripod will take more time and effort.

Using such a homemade device from a laser pointer is not difficult. First, the stand is driven into the ground or placed on the floor, after which it is leveled by the bubble level - the bubble should be strictly in the center. Next, you need to turn on the pointer and mark the point projected on the wall with a pencil. After that, the stand gently rotates along the axis in the horizontal plane, and new marks are put. All points are connected with each other and everything - a straight line on the wall is ready, you can proceed to electrical wiring and other equipment!
It should immediately be noted that you should not rush and start important marking work without calibrating the device. First of all, you must make sure that the homemade work is correct so that the result does not become unexpected for you. To do this, you need to make the adjustment of a home-made laser level (in other words, to check the accuracy of its operation).
You can adjust yourself as follows:
- In the plywood sheet on which the level is installed, you need to screw a self-tapping screw, no more than 120 mm long. The self-tapping head should coincide with the projection line of the laser pointer, as shown in the drawing.

- Next, you need to turn on the pointer and point to one of the walls, after which make the corresponding mark with a pencil. At this point, you do not need to completely tighten the second self-tapping screw so that it acts as a stand.
- Now the profile for drywall or any other flat and long bar, of light weight, is neatly installed on the caps of the screws screwed in.
- A self-made laser level is installed on the profile and, if required, the bar is aligned in the horizontal plane based on the level readings. Alignment must be done by tilting above / below only the edge of the profile that is closer to the wall (the screw that is screwed into the wall where the laser pointer originally showed).
- Aligning the profile by level, you need to screw in a new self-tapping screw in the wall, if necessary, and then remove the profile.
- In the end, a home-made level is installed on the stand, and the pointer is adjusted to a new point (screw hat). Adjustment occurs due to the free-wheeling of the pointer on the rubber, by pulling or releasing the wires or couplers. Now your instrument is perfectly aligned and you can mark up.
Using such a home-made laser device, you can independently draw horizontal lines to conduct covert wiring in home. However, do not rely on high measurement accuracy. The device is homemade and has some error, which must be taken into account.
Option No. 2 - Use a container of water
The second way to make a laser level with your own hands is to apply a water surface. All you need is to choose a container that is suitable in size, for example, a basin and pour into it under the edge of the water. The liquid forms a plane that will be parallel to the horizon. Next, you need to take a piece of polystyrene and fasten the pointer strictly in the middle. After that, the capacity must be set at the level of the future line and put foam in the water with a pointer. We turn on the homemade product and mark the points on the wall, turning the laser in the right direction. Then we connect them and get an even horizontal line. In the video example, all the stages of assembling a homemade level on water are presented in detail:
The disadvantage of this level is that you need to correctly and very evenly fix the pointer on the foam. Otherwise, it will be slightly skewed to one side, which will negatively affect the accuracy of the device.You also need to choose only smooth pieces of foam in the form of a plate, the sides of which are parallel.
So we have provided two step-by-step guides on how to manually make a laser level at home. It is much more difficult to assemble a model like a cross (when the intersection of the horizontal and vertical lines at a given point is built), but still for marking the walls under strobing such a device will work well! By the way, to make a vertical line on the surface, it is recommended to use the most ordinary construction plumb (as shown in the photo), suspended from the ceiling.

Related materials: