Proper check of the performance of the warm floor
Performance check upon purchase and after installation
The first check is carried out when buying a system. You need to ask the seller to demonstrate the operation of the device. If the values of the mats' resistance are indicated in the attached documentation, it is advisable to check their real values with a multimeter or tester. Also possible check insulation resistance. This can be done with a multimeter in the mode of measuring high resistances, or with a megohmmeter.

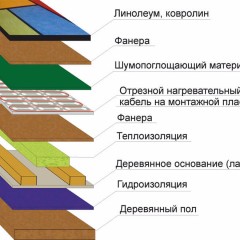
After installing the heating elements, before laying the tiles and before filling the screed, you need to connect the electric underfloor heating to the power supply and watch it work for a while in different modes. Make sure that the temperature controller, temperature sensor and the integrity of the heating cable are working properly. With a working system, all sections of the cable should be heated evenly, the temperature of the heating elements should change in accordance with the task of the thermostat.
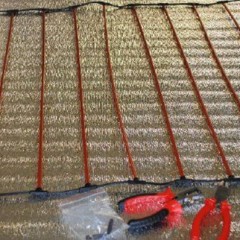
If there is such a possibility, it is most convenient to check the uniformity of heating of the elements with a thermal imager, on the screen of which you can see whether each section of the floor is working or not. This device forms an image that is created by infrared rays, as shown in the photo below:

At this stage, if any malfunction is detected during verification, it is better not to look for the cause and not try to eliminate it. You need to use the warranty and replace the system.
Failure Check
During operation of the underfloor heating, deviations from normal operation may occur. Consider the main manifestations of system malfunction.
Lack of heating over the entire floor area
In this case, the break test must be started from the “head”, that is, make sure that the system is supplied with power. If the indicator for the presence of mains voltage does not light, you need to check the machine on the shield. After that, you can check whether voltage is supplied to the input of the temperature controller. The presence of voltage at the input and the absence of it at the output indicates a malfunction in the temperature regulator itself. The reason can be either the controller itself or the temperature sensor, which can be checked by measuring its resistance.If you apply voltage to the warm floor directly, without a thermostat, you can test the cable for serviceability.
A situation may arise when the machine in the shield, supplying a warm floor, is disabled by the protection. This indicates availability. short circuit. To localize the circuit, we check the resistance between the phase and neutral wires supplying the warm floor. Before you ring the cable, we remove the voltage. We disconnect the power wires from the temperature controller. We measure the resistance "phase - zero" in the area from the shield to the thermostat. If the device shows zero resistance, the wiring in this section is damaged, if the resistance is high, continue the search. Disconnect the floor heating cable from the temperature controller. We measure at the input of the regulator. If a short circuit is detected during the test, then the damage is inside the thermostat. If not, only the heating cable of the underfloor heating remains. Check this by measuring the resistance between the cores of the cable. In this case, opening the floor surface is indispensable.

What to do when voltage is applied to the heating elements but no heating occurs? In this case must be implemented cable continuity, i.e., integrity checking (or breaking, if you like). Setting the multimeter in resistance measurement mode, measure between the cores of the cable. A resistance value close to infinity indicates a broken wire.
The video below clearly shows how to check the electric underfloor heating with a multimeter, measuring the resistance of the heating cable:
Underfloor heating temperature is not adjustable
If the heating elements warm up over the entire floor area, but the temperature does not change when the setpoint set by the regulator changes, it is necessary to check the system by determining one of two possible options:
- a malfunction in the temperature controller circuits;
- defective temperature sensor.
In this case, the temperature controller must be dismantled by disconnecting all wires from it and hand over for repair. On how to check the temperature controller of the warm floor, it is shown in the video:
If you suspect a sensor, you should check its resistance. For this, the sensor wires are disconnected from the regulator, and resistance is measured between them. The conclusion about the health of the temperature sensor of the warm floor can be made if you check the value of its electrical resistance and compare it with the passport data. In extreme cases, you can do without a multimeter. Since this element is still not repairable, you can proceed as follows. Buy a known-good sensor, and placing it on the heated floor, connect to the regulator. If you ensure good contact of the sensor with the floor, with a working controller, the system should work. After that, you can install the new sensor in place. This will require opening the floor surface.
Individual sections do not heat up
If there is a device, checking the uniformity of floor heating can be done using a thermal imager. In this case, the nature of the malfunction can be judged by the total amount of power consumed by the underfloor heating in this mode. Two options are possible:
- power consumption is less than the nominal value;
- underfloor heating consumes increased power from the network.
In the first case, there was a break in the wiring, as a result of which part of the heating elements was de-energized. The second option indicates that a short circuit has occurred between the individual cable sections. At the same time, part of the heating elements is shunted and does not work, the other part consumes high current and overheats.
Finally, we recommend watching another video that shows how a warm floor is checked with a megohmmeter and which device is best used for these purposes:
This way you can check the warm floor with a multimeter. We hope that the provided verification technologies were understandable for you and helped to independently repair the heating system!
It will be useful to read: