How to make roof and gutter heating
Bit of theory
It is possible to ensure gradual and timely melting of snow using the anti-icing system, the main elements of which are:
- The part directly responsible for heating is special heating cables for heating gutters and roofs, as well as a set of fasteners for them for different types of coatings.
- Sensor system, protective (residual current device) and start-up equipment responsible for heating control.
- A network of power and operational conductors designed to supply power directly to the heating part of the system, as well as connecting thermostats and sensors.
Which cable to choose
To install heating systems, three main types of heating cables are used - resistive, self-regulating and composite.
Resistive is very similar in structure to a typical two-core power cable. It consists of several layers of insulation, inside of which are located heating wires, isolated from each other, which are connected to the power circuit. The temperature to which the wire warms up is always constant, as the net power and resistance value. The photo below shows its structure:

The self-regulating heating conductor for heating the roof and gutters is made according to a special technology and, based on its name, is able to independently adjust the heating temperature. This allows you to make it a special structure. It consists of a matrix (it itself regulates the degree of heating depending on the ambient temperature, therefore, changes the resistance) and external insulation, with an insulating shell and a braid inside. The photo below shows what the wire consists of:

Composite heating cable - has two conductive cores, an integrated redundancy system and a sheath of composite materials. The composite shell is dense, uniform, flexible and resistant to high temperatures. The photo below shows what the wire consists of:

To determine the choice of a heating element of the system, we turn to their advantages and disadvantages. So, a resistive conductor costs significantly cheaper, but its service life is less than that of self-regulating and composite cables. In addition, the resistive cable has a strictly defined section length and its sheath does not withstand more than 80 degrees, which means that crossing such a cable is strictly prohibited and installation in downpipes is also not recommended.The self-regulating cable regulates its heat release depending on the ambient temperature and changes the power in different areas, it is not afraid of self-intersection and does not overheat itself. However, this cable has large inrush currents, in addition, its matrix with time Ages and loses power, and the cable also has a minimum bending radius (the matrix is damaged).
The composite heating cable does not have inrush currents, is not afraid of self-intersection, does not have a minimum bending radius (can be used in hard-to-reach areas), it can be cut off of any length by a multiple of a meter. The cable sheath is dense, without air gaps, can withstand temperatures of 180 C. Thanks to the composite sheath, the energy efficiency and heat transfer of the cable is 30% higher than resistive and self-regulating. Usually, the composite cable used for roofing has a constant power of 20 W / m, which is quite enough for the effective operation of the heating system. Low power allows you to save on the cost of the power distribution system and the cost of electricity.
So what is the choice? When installing heating gutters and roofs can use resistive and self-regulating cables together. Their combined use reduces the overall cost of the project and positively affects the final quality of the system. It is customary to use resistive roofs, and self-regulating elements for drainage systems.
However, the rational solution is to use a composite heating cable for the entire roof heating system. Because This cable does not burn out in drainpipes (as resistive), has UV protection and lasts a long time. In cost, such a system is not inferior to a combination of resistive and self-regulating cables, but surpasses it in durability.
Power calculation
Suppose we have a horizontal hanging chute 11 m long, 15 cm in diameter, and a vertical sewer with a diameter of 90 mm and a length of 15 m on our roof.
Calculation of the desired length:
- the length of the gutter is 11 m, respectively, multiplying it by 2 (2 cables must be laid in the gutter), we get a total of 22 m;
- the length of the sewer pipe is 15 m - here one wire is enough for heating, that is, we multiply by 1, we get 15 m;+ margin to strengthen the entrance and exit of the pipe 3m.
- The total length is 22 m + 15 m + 3 m = 40 m.
Compare power calculations for different types of cables:
- The power of resistive and self-regulating cables is 30 W per linear meter.WITHthe total power of a system with a resistive or self-regulating cable is equal to the product of the length of the wire by the rated power - 40 m * 30 W / m = 1200 W.
- The power of the composite heating cable is 20 W per linear meter. The total power of the system with a composite cable is 20 m * 30 W / m = 600 W.
A system with a composite heating cable is more economical than systems with a resistive and self-regulating cable.
How to mount the system
In order to fully embark on the installation of the system, we will consider clearly an example of a scheme for heating the roof and drains and we will adhere to a certain sequence.

First, select the installation location of the automation and control system indoors. Often, the main controller and protection devices must be located near the distribution panel. This is done for ease of installation, and allows you to reduce the length of cable tracks and increase the reliability of the circuit. Connecting the controller will not be difficult, since all its conclusions and terminals are signed and marked. A person who is familiar with the basics of electrical wiring and knows how to handle a tool will quickly navigate and do this job with his own hands.
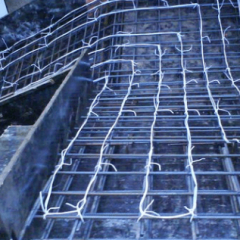
The installation of the heating cable in the gutters should be considered on the basis of the fact that it is divided into four component parts (gutter, sewer, funnel and water inlet), each of which must be heated.To begin with, it is necessary to feed a loop of wire into the drainpipe and screw it into the water inlet using steel clamps. Then we fix the cable in the lower part of the sewer as high as possible, placing it at a distance of 5 cm from each other in the part of the pipe that is closer to the house (melt water usually flows down it). In the same way, we fix the conductor and at the top near the bottom of the funnel. It is important if the pipe consists of several collapsible parts, then in each of them it is necessary to organize an intermediate fastening of the heating system. In the funnel, the cable is laid in the shape of a ring and screwed in with clamps in this position. We pass to the gutter. In it, the wires must be placed on opposite side surfaces. Further, the ends are connected in the junction box to the terminals.
Advice! The self-regulating conductor does not have to be looped. Mounting in one core is suitable, the end of which is insulated with a special plug.

As an example of installing a heating element, take a flat roof. The cable is laid in the lower part along the perimeter of the drainage line and laid in the inner funnel of the drain at a distance of 400 mm if the sewer is located in the building. If the pipe is mounted externally, then the “dripping loop” scheme is used. In the places of contact of the parapet and the roof, the laid conductor should have a power of about 60-70 W / m2. It is also necessary that a wire is laid around a heated funnel at a distance of 2 m as shown in the figure below:

The sequence of cutting the heating wire is shown in the photo:

In conclusion, when the previous steps are over, the gutter and roof heating control system is connected to the heating elements using power cables via junction boxes. Also, all the necessary sensors and protection equipment are connected.
You can clearly see the installation process of the anti-icing system in the video:
That's all I wanted to tell you about how to make your own roof and gutter heating. We hope that the provided instruction was useful and interesting for you!
Recommended reading: