How to check the operation of the light switch?
Conventional key switch
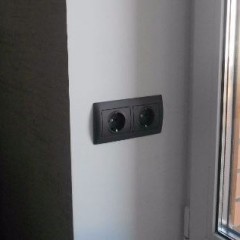
First you need to access the terminals. To do this, depending on its design, you just need to either remove the outer cover or, loosening the expansion hardware, remove the case from the socket without disconnecting the wires, as shown in the photo below:

Multimeter check
We install the tester in the resistance measurement mode. Turn off the machine, from which the light is powered. We connect the test leads of the device with the terminals of the switch. We measure resistance. In the “on” position, the resistance should be zero, in the “off” position - infinity. Otherwise, the circuit breaker must be removed for repair or replacement.
If there is no multimeter at hand, you can also check the performance with a voltmeter. We turn on the device in the mode of measuring AC voltage. Turning off the power, "sit down" on the terminals. We turn on the power supply and measure the voltage. At the same time, at least one working lamp must be screwed into the lamp. In the “off” position, the device should show the mains voltage, i.e. about 220 V. If there is no voltage in this mode, the cause of the malfunction is outside the switch. In the “on” position, the voltage at the terminals should disappear. If this does not happen, the reason is in the contacts.
The video clearly shows how to check the two-key light switch with a multimeter:
Using an indicator screwdriver
It is necessary to check the presence of phase on the terminals with the indicator when the key is in the off position. The machine that supplies the light should naturally be turned on. Voltage must be on only one terminal. The lack of voltage at both terminals indicates that the cause is not the switch. Then you need to turn on the light and check the indicator for the second terminal. Two options are possible here, depending on whether the neutral or phase wire is broken by a switch.
Option 1. To break, as expected, a phase wire passes, the neutral wire is directly led into the lamp. In this case, when the switch is turned on, voltage is present at both terminals. If this does not happen, it is faulty.
Option 2 Zero is set to break, the phase is “on duty” on the lamp (s).In this embodiment, if you turn on the light, a check with an indicator will show the absence of voltage at both terminals. If the voltage remains on one of the terminals, as before turning on, the switch is faulty. By the way, breaking the neutral wire and laying the phase directly to the lamp is considered a gross mistake, which is fraught with electric shock when replacing a light bulb or repairing a chandelier. Rest errors in wiring we reviewed in a separate article!
Light check
About, how to make a test lampWe also told. We screw the bulb into the cartridge, from which two insulated wires are removed. The ends of the wires are cleaned from insulation by 5 - 10 mm. Turn on the machine that feeds the light. Carefully touch the stripped ends of the wires to the terminals of the switch (one wire to one terminal, the second to the other). If the key is in the “off” position, the lamp should not light up completely, as in this case, it is turned on in series with the lighting lamps. Its brightness depends on the ratio of its power and the total power of the lamps in the lamp. If the light does not turn on in this mode, the reason is not the switch. Turn on the light and again touch the wires to the terminals. If our lamp did not light up, the switch is working, if the lamp light is the same as in the “off” position, the cause of the malfunction is in it.
In details light switch repair we reviewed in a separate article, which we strongly recommend that you read!
Backlit Model
There are light switches equipped with a backlight. The essence of this device is that in parallel with the main contacts, an LED with a resistor or a miniature neon indicator lamp is mounted. A diagram of such an embodiment is shown below:

When the lighting is turned off, current flows through the lighting lamp (or lamps) and the LED with current limiting resistance. Its value is too small to ignite the light of the lamp, but sufficient to illuminate the LED. Thus, the light of the diode helps to find the button to turn on the light in a dark room. When we turn on the lamp, the contacts bypass the LED, it is de-energized and turns off.
In addition to ease of operation, such a circuit provides the ability to check the status of the contacts of the switch. After all, the backlight circuit is an analog of the same control lamp, with which you can check a conventional switch. For example, if you pressed a key, the light did not turn on, and the LED did not turn off, which means that the contacts did not close.
Dimmer
A device that controls the brightness of a lamp, called a dimmer. It allows you to smoothly set a comfortable level of illumination in the room. As a rule, modern models of dimmers have an electronic filling. At the same time, the lamp circuit is involved in the operation of the regulator and when it burns out, the regulator may not function. This is due to the features of verification of such a device.

In practice, the dimmer is best checked as follows: turn off the power switch, disconnect the power wires from the regulator terminals and connect them together. Turn on the power switch. If the light comes on at the same time, the regulator is faulty. About, how to repair a dimmer we told in a separate article!
It happens that the cause of the malfunction of the dimmer is the failure of the fuse. The video below clearly shows how to check the fuse in the dimmer:
Another common case is poor contact on the circuit. The method for checking the dimmer is provided in another video example:
Now you know how to check the light switch with a multimeter, indicator screwdriver or a light bulb. We hope that the instructions provided helped you determine the device’s operability on your own!
It will be useful to read: