2 assembly options for a simple welding machine
Nowadays it is difficult to imagine any work with metal without using a welding machine. With this device, you can easily connect or cut iron of various thicknesses and dimensions. Naturally, to perform quality work, you will need certain skills in this matter, but first of all you need a welder himself. Nowadays, you can naturally buy it, as in principle, you can also hire a welder, but in this article we will talk about how to make a welding machine with your own hands. Moreover, with all the wealth of various models, reliable ones are quite expensive, and cheap ones do not shine with quality and durability. But even if you decide to buy a welder in the store, getting to know this article will help you choose the right machine, since you will know the basics of their circuitry. Welders come in several types: DC, AC, three-phase and inverter. In order to determine which option you need, we will consider the design and device of the first two types, which can be assembled without specific skills with your own hands at home.
On alternating current
This type of welding machine is one of the most common options, both in industry and in private households. It is easy to operate, compared to the rest it can be quite easily done at home, which is confirmed by the photo below. To do this, you need to have a wire for the primary and secondary windings, as well as a core made of transformer steel for winding the welder. In simple words, an AC welding machine is a high-power step-down transformer.
The optimum voltage during operation of the welding machine assembled at home is 60V. The optimal current is 120-160A. Now it is easy to calculate what section the wire should have in order to make the primary winding of the transformer (the one that will be connected to the 220 V network). The minimum cross-sectional area of the copper wire should be 3-4 square meters. mm, the optimal one is 7 square meters. mm, you have to consider voltage drops and possible additional load, as well as the necessary margin of safety. We get that the optimal diameter of the copper core for the primary winding of the step-down transformer should be 3 mm. If you decide to take an aluminum wire in order to make a welding machine with your own hands, then the cross section for copper wire must be multiplied by a factor of 1.6.
It is important that the wires are in a rag, it is impossible to use conductors in PVC insulation - when the wires are heated, it will melt and occurshort circuit. If you do not have a wire of the required diameter, then thinner conductors can be used, winding them in parallel. But then it should be borne in mind that the thickness of the winding will increase, and accordingly the dimensions of the apparatus itself.It must be borne in mind that a free window in the core may be a limiting factor and the wire may simply not fit there. For the secondary winding, you can use a thick stranded copper wire - the same as the core on the holder. Its cross section should be selected based on the current in the secondary winding (recall that we focus on 120 - 160A) and the length of the wires.
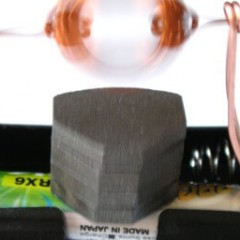
The first step is to make the transformer core of a home-made welding machine. The best option would be a core-type core as shown in Figure 1:

This core must be made of transformer steel plates. The thickness of the plates should be from 0.35 mm to 0.55 mm. It is necessary to reduce Foucault currents. Before collecting the core, you need to calculate its dimensions, this is done as follows:
- Firstly, the window size is calculated. Those. Dimensions c and d in Figure 1 must be chosen to fit all transformer windings.
- Secondly, the roll area, which is calculated by the formula: S roll = a * b, must be at least 35 square meters. see. If the Scroll is greater, then the transformer will heat up less and, accordingly, work longer, and you will not need to be interrupted frequently in order for it to cool. It is better that the S-roll is 50 sq. cm.
Next, we proceed to the assembly of plates of a home-made welding machine. It is necessary to take the L-shaped plates and fold them, as shown in Figure 2, until you can make the core of the required thickness. Then we fasten it with bolts in the corners. In the end, it is necessary to file the surface of the plates with a file and insulate them by wrapping them with rag insulation in order to further protect the transformer from breakdown on the case.
Next, we proceed to winding the welding machine from a step-down transformer. At the beginning, we wind the primary winding, which will consist of 215 turns, as shown in Figure 3.
It is advisable to make a branch from 165 and 190 turns. On top of the transformer we attach a thick textolite plate. We fix the ends of the windings on it with a bolt connection, noting that the first bolt is a common wire, the second is a branch from 165 turns, the third is a branch from 190 turns and the 4th from 215th. This will make it possible to subsequently adjust the current strength during welding, by switching between the different leads of your welding device. This is a very important function, and the more branches you make, the more accurate your adjustment will be.
After proceeding to the winding of 70 turns of the secondary winding, as shown in Figure 4.
A smaller number of turns are wound on the other side of the core - where the primary winding is wound. The ratio of the turns you need to do about 60% to 40%. This helps to ensure that after you catch the arc and start welding, eddy currents will partially disable the work of the winding with a large number of turns, which will lead to a decrease in the welding current, and, accordingly, will improve the quality of the weld. Thus, the arc will be easily caught, but too much current will not interfere with high-quality cooking. The ends of the winding are also fixed with bolts on a textolite plate. You can not attach them, but lead the wires directly to the electrode holder and the crocodile to ground, this will remove the connections where there can potentially be a voltage drawdown and heating. For better cooling, it is highly advisable to install a fan for blowing, for example from a refrigerator or microwave.
Now your home-made welding machine is ready. Having connected the holder and ground to the secondary winding, it is necessary to connect the network to the common wire and the wire extending from the 215th turn of the primary winding. If you need to increase the current strength, you can make fewer turns of the primary winding by switching the second wire to a contact with fewer turns.The current can be reduced with the help of a resistance made of a piece of transformer steel bent in the form of a spring connected to the holder. It is always necessary to ensure that the welding machine does not overheat; for this, regularly check the temperature of the core and windings. For these purposes, you can even install an electronic thermometer.
This is how you can make a welding machine from a step-down transformer with your own hands. As you can see, the instruction is not too complicated and even an inexperienced electrician will be able to independently assemble the device.
Direct current
For some types of welding, a DC welder is required. With this tool, you can cook cast iron and stainless steel. You can make a DC welding machine with your own hands in no more than 15 minutes by remaking homemade on alternating current. For this, a rectifier assembled on diodes must be connected to the secondary winding. As for the diodes, they must withstand a current of 200 A and have good cooling. For this, diodes D161 are suitable.
Capacitors C1 and C2 with the following characteristics will help us equalize the current: a capacitance of 15,000 μF and a voltage of 50V. Next, we assemble the circuit, which is indicated in the drawing below. Inductor L1 is required to adjust the current. Contacts x4 - plus for connecting the holder, and x5 - minus for supplying current to the part being welded.

Three-phase welding machines are used for welding in a production environment, two-electrode holders are installed on them, so we will not consider them in this article, and inverters are made on the basis of printed circuit boards and complex circuits with a large number of expensive radio components and a complex setup process using special equipment. However, we still recommend that you familiarize yourself with the inverter design in the video below.
Visual workshops
So, if you decide to make a welding machine at home, we recommend that you watch the video tutorials provided below, which will clearly show how to assemble a simple welder from improvised materials yourself, as well as explain some details and nuances of work:
Now you know the basic principles of the design of welders and you can make a welding machine with your own hands, both on direct and alternating current, using the instructions from our article.
Also read: